HOW TO PRINT WITH LW-PLA
At colorFabb material development never stops. We’re starting the 2019 with a fascinating new material, first of its kind in FFF 3D printing materials.
We’re proud to announce, colorFabb LW-PLA. This filament uses an active foaming technology which is triggered by temperature. At it’s peak the filament will expand nearly 3x it’s volume, meaning users can decrease flow by 65% to obtain lightweight parts, or use the expanding properties to speed up print time by using big layer heights or single extra thick perimeters.
colorFabb LW-PLA is available in multiple colors. The foaming also gives printed parts a rough matte surface finish, which makes parts look very appealing.


HOW DOES IT WORK?
This material is based on our unique PLA/PHA recipe which means that it will print very similar to our other PLA/PHA materials. We’re sure most will be able to dial in settings in no time, but we still thought a write-up on print settings is interesting to share. If you have great tips or slicer settings please share! support@colorfabb.com


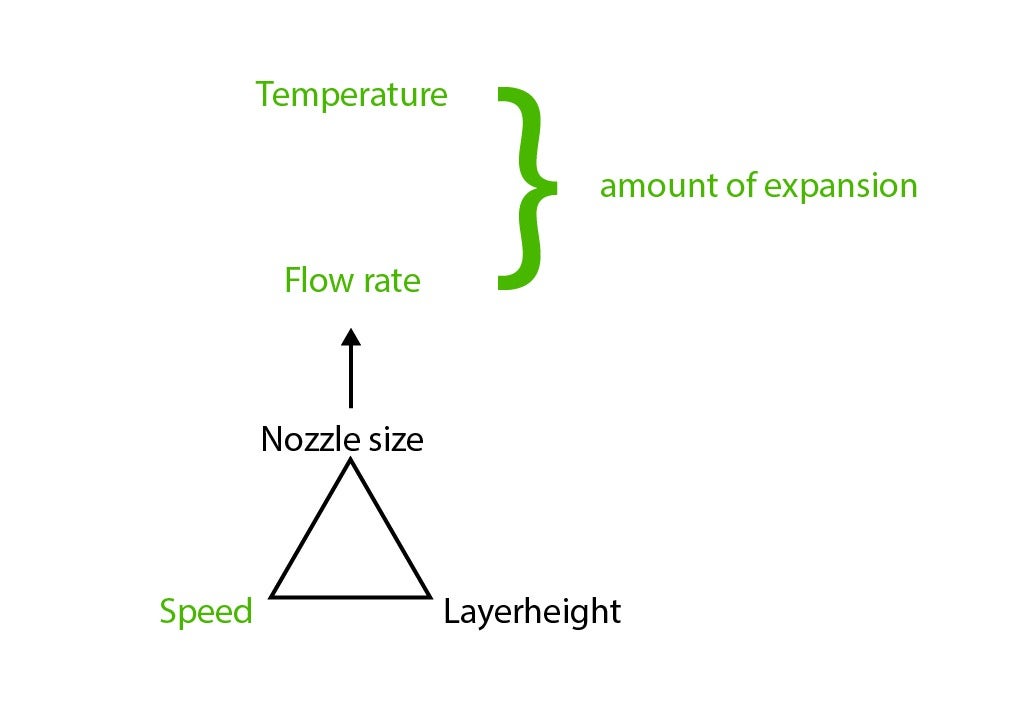
Assuming nozzle size and layerheight are fixed, our main input variables are Temperature, speed and flow to determine the amount of expansion.Assuming nozzle size and layerheight are fixed, our main input variables are Temperature, speed and flow to determine the amount of expansion.


HOW TO DETERMINE THE EXPANSION OF THE FILAMENT
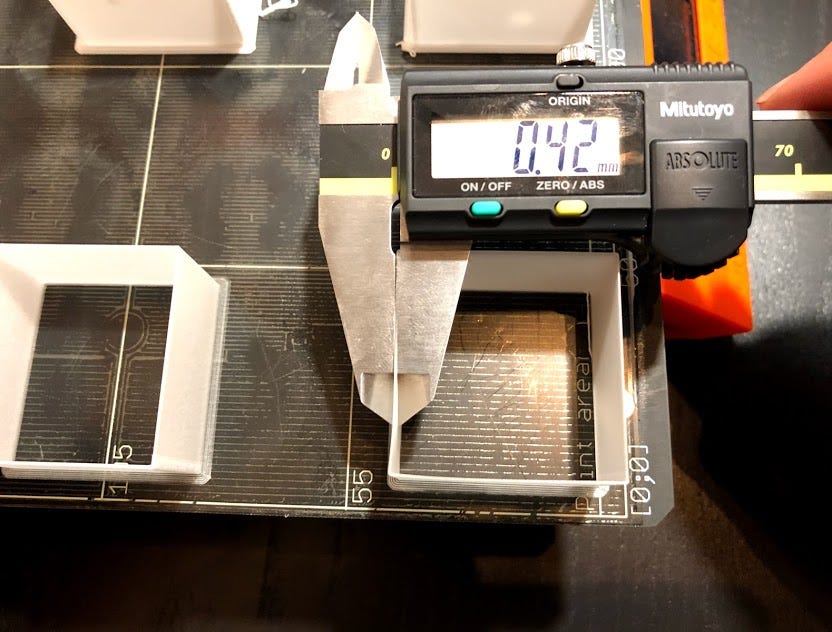
If you want to print lightweight parts which are dimensonally accurate, it’s important to first determine the possible expansion of the material. This can be done by printing single perimeter test cubes (Download here: Test Cube) without top and bottom layers. We use the following 4 step process to determine the maximum expansion at a certain speed, temperature and flow.
- PRINT CUBES (Download here: Test Cube) AT A SET SPEED IN TEMPERATURES VARYING FROM 200°C UP TO 280°C
- MEASURE PERIMETER THICKNESS OF EACH CUBE, NOTE TEMPERATURE WITH HIGHEST EXPANSION.
- PRINT CUBES WITH DECREASING STEPS OF FLOW, USING TEMPERATURE FOUND IN STEP 2.
- FIND THE CUBE AT WHICH PERIMETER THICKNESS EQUALS NOZZLE SIZE.
See the example on the right >>
LIGHTWEIGHT PRINTING
| Temperature | 245-260°C |
| Flow | Down to 35% |
| Print speed | Up to 40mm/s |
Lightweight printing can be done by using the settings determined in the paragraph above. Keep in mind that if the flow is decreased to low values the hot-end might clog due to the filament expanding before exiting the nozzle.
| Temperature | Up to 260+°C |
| Flow | 50% |
| Print speed | 30-50mm/s |
| Max layerheight with 0.4mm nozzle | 0.6mm |
Due to the expanding behavior of the material it is possible to 3D print with larger layer heights the nozzle itself, this means short build times for quick draft models.
EXAMPLE – PRUSA I3 MK2S
STEP 1. PRINT CUBES AT A SET SPEED IN TEMPERATURES VARYING FROM 200°C UP TO 280°C


Print speed – 25mm/s
Part cooling – 0%
Printing temperature – 200°C to 280°C in steps of 10°C.
Layer height – 0.2mm
Nozzle diameter – 0.4mm


STEP 2. MEASURE PERIMETER THICKNESS OF EACH CUBE, NOTE TEMPERATURE WITH HIGHEST EXPANSION.


Cube at 200C – no expansion of material.


Cube printed at 250C – perimeter measured at 1.05mm (this is Prusa MK2S specific. The maximum expansion can be different depending on your printer) , which yields a 260% increase of perimeter thickness. Between 240-250C the expansion of the filament was highest.
STEP 3. PRINT CUBES WITH DECREASING STEPS OF FLOW, USING TEMPERATURE FOUND IN STEP 2 (IN OUR CASE 250C).


STEP 4. THE CUBE WITH THE PERIMETER THAT EQUALS THE NOZZLE DIAMETER IS THE LOWEST USABLE FLOW. EXPECT FLOWS AROUND 35-50%.


In our case we found the cube with 30% flow to be equal to the nozzle size.


Please click here to see our latest Bambu printer settings for the LW-PLA
