How to print with bronzeFill
BRONZEFILL
This material is based on our unique PLA/PHA recipe which means that it will print very similar to our other PLA/PHA materials. We’re sure most will be able to dial in settings in no time, but we still thought a write-up on print settings is interesting to share. If you have great tips or slicer settings please share! support@colorfabb.com
BUILD PLATFORM
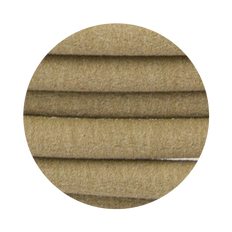
This filament will print great on both heated and non heated build platforms. For cold build platforms we generaly use blue painters tape which you can buy at any decent hardware store. We’ve noticed that bronzeFill has prety much no warping what so ever, it’s much better then regular PLA.
For heated build platforms we use a temperature of 55-60 C which will keep the print sticking to the platform. It can be printed straight on glass or with a bit of gluestick applied to it. We’ve also printed it succesfully on kapton tape with the same temperature settings.
SLICER SETTINGS
The next few tables show the most relevant slicer settings for Cura en Makerware. If you prefer to use a different slicer software you should be able to find similar settings and create your own profiles.
| 3D PRINTER | LAYERHEIGHT (MM) | SPEED (MM/S) | TEMPERATURE (C) | BUILD PLATE TEMP (C) | RETRACTION DISTANCE (MM) | RETRACTION SPEED (MM/S) |
|---|---|---|---|---|---|---|
| Ultimaker Original | 0.2 | 50mm/s | 215 | n.a. | 4.5 | 45 |
| Ultimaker 2 | 0.2 | 50mm/s | 220 | 55 / 60 | 4.5 | 25 |
| Makerbot Replicator 2 | 0.2 | 70mm/s | 200C | n.a. | (standard makerware) | (standard makerware) |
POST PROCESSING
Normally we don’t like to do post processing of any of our prints, they should look awesome straight of the printer. For bronzeFill we’re happy to make an exception, since it will elevate your models to another level when polished. Here we’ll document the various methods of post processing the 3d prints. We’re a little out of our depths here so we’ve been seeking help from the active community of makers.
1. Sanding
First what you want to do is sand your model with a fairly rough grit of sand paper, something like 220-240 should work nicely. BronzeFill is much easier to sand down then regular PLA, so depending on your model this shouldn’t take too long. By increasing the grit of the sand paper the model will get smoother everytime, exposing the bronze particles at the surface, but it will still look matte and dull.
2. Steel wool
This tip came in from Paul Braddock, a talented character modelling artist and active member of the Ultimaker community. He used steel wool to polish the surface which will start exposing the bronze particles even more. We’ve tried this method with a fairly fine grade of steel wool and were impressed how shiny it already got!
3. Making it Shiny!
Now that the layers are sand down and the bronze particles are already shining a bit on top of the surface it’s ready for the next step. Now this is were it becomes really interesting, since there are so many methods of making bronze shiny. We used a copper polish which gave nice results. It was applied with a dry towel making small circular movements and applying light pressure, then we used another side of the towel to get rit of all the polishing paste.
Apart from polishing the material to make it more shiny one can also apply products to create a patina look. We haven’t been able to try this personally but Paul Braddock did. This is what he was able to create with an antigue Patina, it looks stunning.

The infamous torture test by Make, printed on the Ultimaker Original. Slight stringing which might be solved with a adjusted retraction settings.

An excellent result of the Torture test printed on the Makerbot Replicator 2.

We used steel wool after sanding down the layers.

A print by Paul Braddock “treated with an antique patina, the bronze fill reacts to it just like foundry cast bronze.”