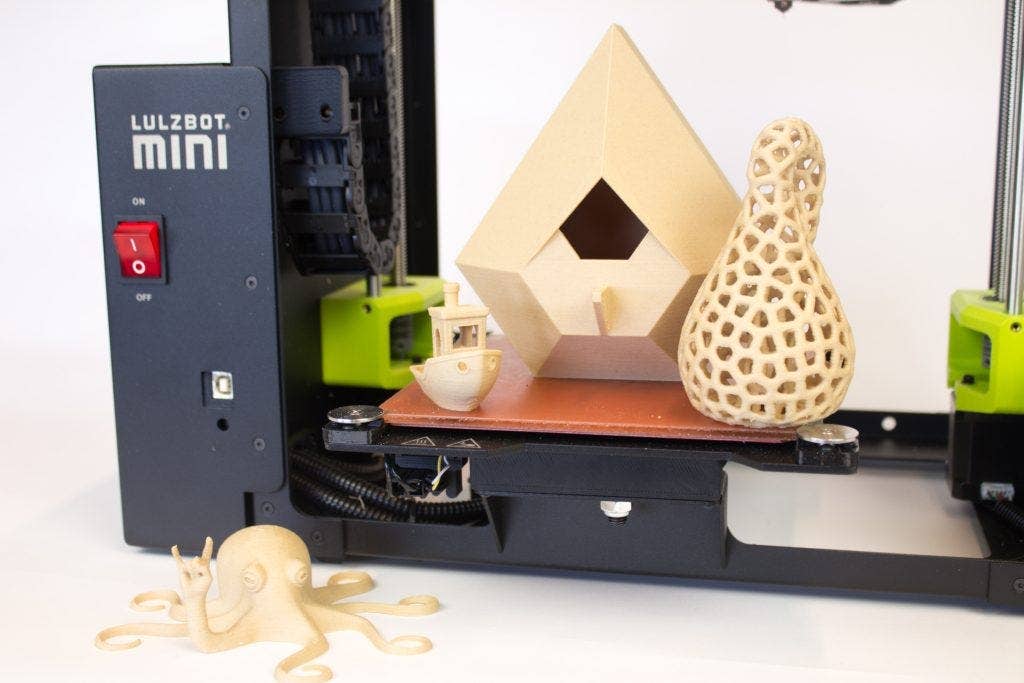
How to Print with woodFill Filament: A Complete Guide to Realistic Wood-Like 3D Prints
If you’re looking to add a unique, organic aesthetic to your 3D prints, ColorFabb’s woodFill filament is the perfect choice. This filament blends PLA with fine wood fibers, producing prints that not only look like real wood but also have a satisfying tactile quality. woodFill opens up a world of possibilities for artists, designers, and hobbyists who want to create realistic wooden objects, from decorative pieces to functional items. However, printing with woodFill requires a bit of finesse to achieve the best results.
In this guide, we’ll walk you through the essentials of printing with woodFill filament—including recommended settings, printer setup, and post-processing techniques—to help you produce 3D prints with stunning wood-like textures and finishes.
What is woodFill Filament?
Key Properties of woodFill
woodFill is a composite filament that combines PLA (polylactic acid) with natural wood fibers. This gives it the look, feel, and even smell of real wood while retaining the ease of use associated with PLA. Because woodFill contains actual wood particles, it can be sanded, stained, and finished much like wood, making it a versatile choice for creative projects.
Key characteristics of woodFill include:
- Wood-Like Appearance: The embedded wood particles give prints a natural wood grain texture, resulting in a unique, organic finish.
- Easy to Print: woodFill prints similarly to PLA, making it accessible for most 3D printers without special hardware.
- Post-Processing Flexibility: Just like real wood, woodFill can be sanded, stained, and varnished to achieve various finishes.
- Distinct Wood Aroma: When printing, woodFill emits a pleasant wood smell, adding to the realistic wood-printing experience.
Benefits of Using woodFill Filament
- Authentic Wood Aesthetic: Perfect for creating decorative items, art pieces, and architectural models that look and feel like real wood.
- Customizable Finish: The filament’s wood fibers allow for sanding, staining, and painting, enabling you to achieve different textures and colors.
- PLA-Based Ease of Use: woodFill retains the printability of PLA, making it compatible with most FDM printers.
- Eco-Friendly: Made from PLA, woodFill is biodegradable and environmentally friendly, adding to its appeal as a natural-looking material.
Ideal Applications for woodFill
Thanks to its unique appearance and easy printability, woodFill is ideal for a variety of applications, such as:
- Art and Sculptures: Great for creating art pieces, figurines, and decorative items with a rustic, natural look.
- Architectural Models: Realistic wood textures are perfect for scale models of buildings, houses, and other architectural projects.
- Household Items: From coasters to planters, woodFill can be used to make beautiful, functional home decor items.
- Personalized Gifts: Create custom, wood-like nameplates, ornaments, and other gift items that feel unique and special.
How to Print with woodFill Filament
Printing with woodFill is similar to printing with standard PLA, but there are some specific adjustments to achieve the best possible results. Here’s a step-by-step guide to setting up your printer and optimizing print settings.
1. Recommended Printer Setup
Hardened Steel or Ruby Nozzle
Since woodFill contains natural wood particles, it can be slightly abrasive and may cause wear on a standard brass nozzle over time. To avoid this, it’s best to use a hardened steel or ruby nozzle if you plan to print with woodFill frequently. Additionally, using a 0.4 mm nozzle or larger can help prevent clogging, especially for longer prints.
Heated Bed
A heated bed is not strictly necessary for woodFill, but it can improve adhesion for larger prints. If your printer has a heated bed, set it to between 50°C and 60°C. However, woodFill generally adheres well to a clean glass bed or PEI sheet without additional heat.
Print Surface
woodFill adheres well to glass, PEI, and build surfaces treated with glue stick or painter’s tape. For the best results, ensure that the print surface is clean and free of dust or oils.
2. Optimal Temperature Settings
Extruder Temperature
The recommended extruder temperature for woodFill is between 200°C and 220°C. Printing at a lower temperature (around 200°C) can result in a lighter wood color, while higher temperatures (up to 220°C) may darken the filament slightly, giving your print a more “aged” or “burnt” wood appearance.
Bed Temperature
If you’re using a heated bed, set the temperature between 50°C and 60°C to improve adhesion. A heated bed is not mandatory, but it can help with first-layer adhesion on larger prints.
3. Print Speed and Retraction Settings
Print Speed
Print at a moderate speed to avoid clogging and achieve a good surface finish. A speed of 40-60 mm/s is ideal for woodFill. For highly detailed models, slowing down to around 30 mm/s can help capture finer details.
Retraction Settings
Minimize retraction to avoid filament jams. Set a retraction distance of 1-2 mm and a retraction speed of 20-30 mm/s. Excessive retraction can cause clogging, particularly in Bowden extruders. If stringing is a problem, try reducing the print temperature slightly rather than increasing retraction.
4. Layer Height and Extrusion Settings
Layer Height
A layer height of 0.2 mm is a good starting point for woodFill, as it provides a balance between detail and print speed. Lowering the layer height to 0.1 mm can enhance detail, while increasing to 0.3 mm can speed up printing for larger objects.
Extrusion Multiplier (Flow Rate)
Set the extrusion multiplier to 100%. If you notice under-extrusion or gaps between layers, slightly increase the flow rate by 5%. Conversely, reduce the flow rate if you observe over-extrusion or rough surface texture.
Post-Processing Techniques for woodFill
One of the best features of woodFill is that it can be post-processed like real wood. Here are some techniques to achieve a realistic wood-like finish on your 3D prints.
Sanding and Smoothing
-
Start with Coarse Sandpaper (120-240 grit): Begin by sanding your print with coarse sandpaper to remove visible layer lines. This will smooth out the surface and prepare it for finer sanding.
-
Progress to Finer Grits (400-600 grit): Switch to finer grit sandpaper for a smoother finish. Wet sanding can help reduce dust and provide a polished look.
-
Polishing with Steel Wool: After sanding, use fine steel wool to give the surface a polished look. This will enhance the wood texture and give your print a more realistic appearance.
Staining and Varnishing
-
Apply Wood Stain for a Custom Color: woodFill can be stained just like real wood. Use a wood stain to darken the color or achieve specific wood tones. Apply the stain with a cloth or brush and allow it to dry thoroughly.
-
Use Varnish for a Finished Look: After staining, apply a clear varnish to protect the print and add a smooth finish. This step also enhances the wood-like appearance and can add gloss or matte texture depending on your preference.
-
Experiment with Different Finishes: You can experiment with multiple layers of stain or varnish to achieve a custom look. Mixing stains or using different finishes can add character and make your prints look more authentic.
Creating a Wood Grain Effect
For added realism, you can create a wood grain effect by brushing the surface with a wire brush. This adds texture and simulates the natural grain found in wood, giving your print a unique, handcrafted appearance.
Troubleshooting Common Issues with woodFill
Issue: Clogging in the Extruder
Solution: woodFill’s wood particles can sometimes cause clogs, especially in smaller nozzles. Use a 0.4 mm or larger nozzle and minimize retraction. Regularly clean your nozzle to avoid buildup.
Issue: Poor Bed Adhesion
Solution: Ensure the print bed is clean and leveled properly. Using a heated bed set between 50°C and 60°C can improve adhesion. Applying a thin layer of glue stick or painter’s tape may also help.
Issue: Stringing or Blobbing
Solution: Adjust retraction settings and lower the extruder temperature slightly if you notice stringing. Reducing print speed can also help improve surface quality and reduce stringing.
Issue: Uneven Coloration
Solution: woodFill’s color can vary with temperature. Higher temperatures produce a darker color, so maintaining a consistent temperature is essential for an even finish. Adjusting the extruder temperature can also create intentional color variations for a more unique appearance.
Tips for Achieving the Best Results with woodFill
- Experiment with Temperature for Different Colors: Lower temperatures produce a lighter color, while higher temperatures give a darker, aged wood look. Experiment to find the effect you prefer.
- Store Properly: Like other PLA-based filaments, woodFill is hygroscopic and can absorb moisture, which can affect print quality. Store it in a dry container with desiccant packs.
- Minimize Retraction: Excessive retraction can cause clogging. Use minimal retraction settings, especially with Bowden extruders.
- Take Advantage of Post-Processing: Sanding, staining, and varnishing can all be used to bring out the best in your woodFill prints. These steps can make your 3D prints look and feel like real wood.
Recommended Slicer Settings for woodFill
For slicers like Cura, PrusaSlicer, or Simplify3D, start with these recommended settings and adjust as needed:
- Extruder Temperature: 200°C - 220°C
- Bed Temperature: 50°C - 60°C
- Print Speed: 40 - 60 mm/s
- Layer Height: 0.2 mm (adjust for detail)
- Retraction Distance: 1 - 2 mm
- Retraction Speed: 20 - 30 mm/s
- Cooling Fan: 30-50%
ColorFabb woodFill is a fantastic filament that allows you to create 3D prints with a realistic, wood-like appearance. By following these settings and techniques, you can produce high-quality prints with natural textures and tones. Whether you’re printing art pieces, architectural models, or decorative items, woodFill opens up new possibilities for adding warmth and authenticity to your designs. With the right approach, your woodFill creations will be almost indistinguishable from real woodwork!


