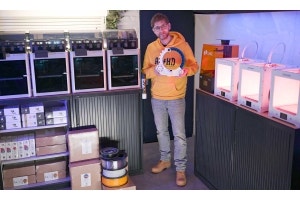
Keeping your tools organized can be a game-changer for any workspace, whether you’re a professional craftsman, a DIY enthusiast, or a 3D printing hobbyist. Custom 3D-printed tool inlays are an excellent way to achieve a clean, functional, and efficient setup that’s tailored specifically to your tools. With ColorFabb’s filaments, you can create durable, precise, and visually appealing inlays for toolboxes, workbenches, and storage cases.
Gone are the days of rummaging through a cluttered drawer for the right screwdriver or wrench. 3D-printed tool inlays let you create a custom-fit home for every tool, making it easy to keep your workspace organized and improving your overall workflow. In this guide, we’ll walk you through the benefits of creating tool inlays, how to design and print them, and why ColorFabb filaments are the perfect choice for this project.
Why Create Custom Tool Inlays?
Custom tool inlays provide a professional level of organization while protecting your tools from damage. Here are some key reasons to incorporate 3D-printed tool inlays into your workspace:
1. Organization and Efficiency
With tool inlays, every tool has its designated place. This reduces the time spent searching for tools and ensures that your workspace is always tidy and functional.
2. Protection for Your Tools
Inlays prevent tools from moving around, reducing the risk of wear and tear. Delicate or expensive tools, in particular, benefit from the added protection.
3. Custom Fit for Every Tool
Unlike generic foam inserts or store-bought organizers, 3D-printed inlays can be precisely tailored to the shape and size of your specific tools.
4. Durable and Long-Lasting
3D-printed inlays made from high-quality materials, like those offered by ColorFabb, are resistant to wear and can withstand the rigors of daily use.
5. Aesthetically Pleasing
A well-organized toolbox with custom inlays not only improves functionality but also looks sleek and professional. You can even print inlays in different colors to create a visually appealing and color-coded system.
Materials for 3D-Printed Tool Inlays
Choosing the right filament is critical for creating tool inlays that are both durable and practical. ColorFabb offers a range of materials that excel in strength, flexibility, and ease of printing:
1. ColorFabb PLA/PHA
- Why It’s Great: PLA/PHA is an upgraded version of standard PLA, combining toughness with ease of printing. It offers good rigidity and flexibility, making it ideal for tool inlays that don’t need to endure extreme conditions.
- Best For: Light-duty toolboxes, indoor use, or hobbyist projects.
2. ColorFabb PETG Economy
- Why It’s Great: PETG is strong, durable, and resistant to moisture, chemicals, and impacts. It’s perfect for tool inlays that need to withstand heavy use or be exposed to harsh environments.
- Best For: Professional toolboxes, outdoor use, and industrial applications.
3. ColorFabb nGen
- Why It’s Great: nGen offers an excellent surface finish with great durability and temperature resistance. It’s ideal for tool inlays that require a polished look or need to withstand higher temperatures.
- Best For: High-end tool storage or display cases.
4. Flexible Filaments (ColorFabb TPU)
- Why It’s Great: Flexible filaments like TPU provide a rubber-like texture, offering extra cushioning for tools that need more protection.
- Best For: Inlays for delicate or fragile tools like precision instruments, measuring devices, or electronic tools.
How to Design and Print Custom Tool Inlays
Creating your own tool inlays may sound complex, but with the right approach, it’s a straightforward and rewarding process. Here’s how to get started:
Step 1: Scan or Measure Your Tools
The first step in creating custom tool inlays is to measure or scan your tools to capture their exact dimensions and shapes. There are a few ways to do this:
- Manual Measuring: Use calipers or a ruler to measure the length, width, and depth of each tool. Sketch the shapes by hand or in a design program.
- 2D Tracing: Place your tools on a flatbed scanner or trace them on paper, then digitize the outlines in a 2D design program like Inkscape or Adobe Illustrator.
- 3D Scanning: For precise and complex shapes, use a 3D scanner to capture a detailed model of each tool.

Step 2: Design Your Inlay
Once you have the shapes of your tools, use CAD software to design the inlay. Programs like Fusion 360, TinkerCAD, or FreeCAD are excellent for creating custom inlay designs.
Tips for Designing Tool Inlays:
- Tool Cutouts: Ensure each cutout matches the shape of the tool but leaves a small tolerance (e.g., 1–2mm) for easy placement and removal.
- Depth Control: Design the cutouts to be deep enough to secure the tools while keeping them accessible.
- Labeling and Icons: Add text or engraved symbols next to each cutout to label the tools or create a visual guide.
- Grid Layout: Arrange the tools in a logical, space-efficient grid pattern for better organization.
Step 3: Slice and Print the Inlay
Prepare the inlay design in your slicing software. Optimize the print settings for the chosen filament to ensure a durable and high-quality result.
Recommended Print Settings:
- Layer Height: Use 0.2mm for a good balance between speed and detail. For intricate cutouts, reduce to 0.1mm.
- Infill Density: Use 20–30% infill for lightweight inlays. Increase to 50–70% for added rigidity if needed.
- Wall Thickness: Set the wall thickness to at least 1.6–2mm for strength.
- Bed Adhesion: Use a heated bed and an adhesive (e.g., glue stick) to prevent warping.

Step 4: Post-Processing and Assembly
After printing, finish your tool inlays for a professional look and perfect fit:
- Test Fit: Check the fit of each tool in its designated cutout. If necessary, adjust the fit by lightly sanding or trimming the edges.
- Surface Finish: Sand or polish the surface for a smoother texture, especially if the inlay will be visible.
- Attach the Inlay: Secure the inlay inside your toolbox, drawer, or case using adhesive or double-sided tape.
Tips for Customizing Your Tool Inlays
- Color Coding: Print inlays in different colors to organize tools by category (e.g., red for screwdrivers, blue for wrenches).
- Engraved Labels: Add engraved text or symbols to indicate the tool type or size.
- Add Handles: Design small handles or pull tabs on the inlay for easy removal from toolboxes.
- Hybrid Materials: Combine rigid and flexible materials to create inlays with both structural support and cushioning.
Applications for 3D-Printed Tool Inlays
Custom tool inlays are versatile and can be used in a variety of contexts:
- Toolboxes: Organize your tools for quick and easy access during projects.
- Workshop Storage: Create wall-mounted inlays for tools to keep them off workbenches while remaining accessible.
- Travel Cases: Protect your tools during transport with secure, custom-fit inlays.
- Display Cases: Showcase high-end tools, collectibles, or antique instruments in a professional and visually striking way.
Why Use ColorFabb Filaments for Tool Inlays?
ColorFabb is known for its high-performance filaments, making them ideal for functional and durable projects like tool inlays. Here’s why makers choose ColorFabb:
- Durability: PETG and PLA/PHA filaments offer excellent strength and reliability for long-lasting inlays.
- Ease of Use: ColorFabb filaments are engineered for consistent extrusion and minimal print failures, even for complex designs.
- Versatility: With a wide range of filament options, including flexible and specialty materials, you can tailor your inlays to your specific needs.
- Aesthetics: ColorFabb filaments are available in vibrant colors and unique finishes, allowing for visually appealing designs.